Burn Test Basics! How To Assess Your Candles For Quality & Performance
|
|
|
Czas czytania 8 min
|
|
|
Czas czytania 8 min
Whether you create candles for fun or as part of your business, making sure they’re safe, consistent, and burn perfectly is a must. Burn testing is the foundation of understanding how your candles behave, and it’s crucial for avoiding problems that could affect everything from scent to safety to the look of your finished product. In this guide, we’ll take you through the basics of how to burn test your candles, explore the main factors behind a beautiful burn, and walk you through straightforward steps for testing at home. You’ll finish with practical know-how, simple testing techniques, and a downloadable burn test sheet to make your process smoother.
Table of Contents
A burn test is a controlled way to see how your candle really performs when someone lights it in their home. For anyone making candles, burn testing is a vital quality check—it shows you key details like:
How steady the flame is
Whether the wax melts evenly (or forms a proper melt pool)
How the wick behaves
How well the fragrance carries
Good burn testing keeps your candles safe, maximises performance, and ensures each candle brings a reliable, enjoyable burn to everyone who uses it!
Every candle’s burn is the result of a careful balance of several factors, from the wick to the wax to the finishing touches. Fine-tuning these variables not only helps you create a beautiful candle but also keeps your customers safe and happy.
Choosing the right wick selection and size
Wick choice can make or break your candle. The wick’s size and type shape the flame’s height, the depth and width of the melt pool, and how evenly the candle burns. If the wick is too small, your candle may tunnel, leaving wax clinging to the sides and wasting those precious ingredients. Too large, and you’re likely to get an oversized flame—this can burn the wax too quickly and even cause your container to become dangerously hot.
Trimming matters just as much as the wick itself. Trim the wick to about 5 mm before each burn. Left too long, a wick produces black smoke, “mushrooming” at the tip, and a flickering flame that’s not just unsightly, but also a fire hazard. By diligently testing various wick sizes and styles as part of your burn test, you can find what works best for your chosen wax, scent, and vessel.
Understanding wax type and additives
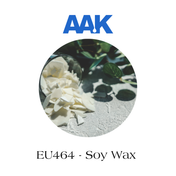
Different waxes bring different personalities to your candle. Soy, paraffin, coconut, and beeswax all have unique melting points and ways of holding scent. Soy wax, for example, may need a wider wick to generate an even melt pool, while paraffin tends to pair well with slimmer wicks due to its lower melting point.
Additives can shift burn behaviour, for better or worse. Glitter can clog the wick, creating a weak or sputtering flame. To avoid disappointing results or safety risks, stick to candle-safe additives and skip anything not intended for candle use.
How fragrance and dye impact your burn
Fragrance and colour are where your creativity shines, but they do need a careful hand. Too much fragrance oil can smother the flame, clog the wick, and produce smoke, while too little means a faint scent.
The same goes for dyes; heavy-handed use or unsuitable pigments can lead to uneven burning, mushrooming, or instability in the flame.
Getting reliable burn test results starts with a clear, organised process. Here’s a simple path to follow for assessing both the quality and safety of your candles.
Light your candle and start your timer. Let the candle burn for , 4 hours , unless using a vessel smaller than 20cl . This simulates how a customer will likely use the candle and gives you a chance to observe the melt pool and vessel heat.
While the candle burns, focus on three key observations:
Complete a few burn cycles (typically up to four), allowing the candle to cool and the surface to harden between each round. This process gives you a full view of how the candle performs over time—not just at the first lighting.
What's A Power-Burn?
Let the candle burn until all the wax is used up and the wick goes out by itself. You need to do this to test how well the candle vessel handles the heat from the flame - you don't want your jar shattering due to the heat of the candle's final flame!
This is known as a power-burn and should be conducted in a sink or somewhere that can catch the glass if it cracks. A power-burn is when you push a candle to its absolute limit to test its safety parameters – customers should not be doing this! It’s always advised to leave 1cm of wax remaining once a candle is done.
Evaluating your candle's overall performance
Now, step back and look at your results from all burn cycles as a whole. Did your candle produce a full melt pool at the right time? Was the flame steady and free from soot? Did the container stay cool enough to touch, and was the scent noticeable in the room as you intended?
If you can say yes to all of these, you’ve got a candle that’s up to scratch! If not, use your findings to guide your next round of recipe adjustments.
Achieving a reliable burn not only makes your candles more enjoyable and safe, but also helps strengthen trust in your own creative work—and in NI Candle Supplies as your go-to source for quality materials.
✨Download Our Handy Burn Test Sheet ✨
(it's free)
Burn Testing Made Easy!
We know that staying organised is key when burn testing your candles, so we’ve put together a downloadable burn test sheet just for you.
This practical worksheet helps you keep track of every detail, from wick type and wax blend to melt pool depth and fragrance strength.
Use it to simplify your quality checks and make it easy to compare results between batches. Download your copy and keep your candle testing process smooth and consistent!
Consistent burn testing is the foundation of safe, reliable, and beautifully performing candles. Taking the time to test and record your results lets you adjust your process, minimise issues like tunnelling or excessive soot, and make sure every candle delivers on both safety and scent.
The effort you put into burn testing is truly visible in the end product, showing the care and craftsmanship behind each candle. With clear routines and helpful notes, you can build lasting confidence and pride in your creations—whether you are lighting them at home or sharing your handmade products with others.
FAQs
Can I test multiple scents at once?
It’s best to test one scent at a time to accurately assess its performance without interference from other fragrances.
How often should I conduct burn tests?
It’s advisable to conduct burn tests for new formulations or when making changes to the candle recipe, such as adjustments to wicks, wax types, or fragrance oils.
What is the 8:10 rule for candles?
The 8:10 rule is about fragrance load, or how much fragrance oil you can safely add. Usually, adding 8 to 10 percent fragrance oil by weight to your wax gives a strong scent without causing problems like wick clogging or extra smoke. Always check the guidelines for your particular wax to avoid any issues. Use our handy Scent Load Calculator to make working out scent ratios a breeze!
Products Featured In This Blog
NI Candle Supplies specialises in high-quality candle-making materials, offering a diverse range of waxes, wicks, and fragrances. Committed to inspiring creativity, we provide resources for beginners and seasoned artisans. Our mission is to empower candle makers with quality products and expert guidance, fostering a vibrant community of enthusiasts who share a passion for craftsmanship and creativity.
You Might Also Like...
Powiązany produkt
30cl Kimberley Candle Jar (LARGE) - Amber
£12,60