Candle Wet Spots: What They Are, What Causes Them And How To Fix Them!
|
|
|
Tiempo de lectura 5 min
|
|
|
Tiempo de lectura 5 min
Candle wet spots frustrate anyone passionate about creating beautiful candles. These blemishes appear as unsightly patches along your candle's sides, stealing away from that perfect finished look you worked so hard to achieve. We're here to walk you through understanding, preventing, and fixing these pesky problems!
Candle wet spots, sometimes called "wet patches on candles" or "wax wet spots in candles," show up where your wax has separated from its container, giving off that wet or oily look.
Don't worry though, these aren't actually wet areas. They're simply air pockets that develop between your solidified wax and the glass container walls. While wet spots in candles are purely visual flaws that won't mess with how your candle burns, they definitely take away from its polished appearance.
These candle wetness spots pop up regularly in candlemaking, often leaving you with a less refined final product. Getting familiar with these surface imperfections is your first move toward creating that flawless candle finish.
Wet spots on candles might look concerning, but they're mostly cosmetic quirks rather than serious flaws. Getting to grips with what causes them is your first step toward creating candles with that polished, professional appearance. These candle wet spots typically happen when wax and container don't play nicely together during cooling.
Temperature fluctuations and cooling
Inconsistent cooling sits at the heart of most wet spot problems. When wax cools too fast or unevenly, it shrinks at different speeds, creating poor contact with your container walls. A quick temperature drop makes the wax pull back from glass jars and other containers, leaving those telltale wet patches on candles.
We recommend letting wax cool gradually at a steady room temperature, which prevents the dramatic shrinkage that causes wet spotting. Keep your cooling candles away from draughts, air conditioning, and chilly spots. This simple step maintains proper wax adhesion and stops those frustrating wet marks from forming.
Wax adhesion and type
Your wax choice plays a huge role in whether wet spots on candles will appear. Different wax types stick to containers with varying success, and some are naturally more prone to pulling away from glass surfaces.
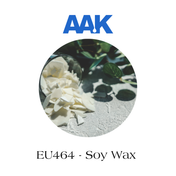
Soy wax, while loved for being eco-friendly, tends to develop wet spots more often due to how it naturally contracts as it cools. Paraffin wax generally grips container walls more reliably. Whether you're working with soy, paraffin, or blends, getting your pouring temperature right and preparing containers properly makes all the difference in reducing these surface imperfections.
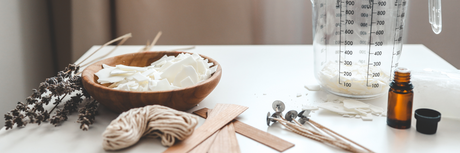
Everything You Need To Get Started With Candle Making
Stopping wet spots before they start comes down to nailing your technique and picking the right materials. When you focus on careful execution, you'll see far fewer of these surface issues.
Optimal pouring and cooling techniques
Getting that smooth candle surface right starts with hitting the perfect wax temperature and keeping things steady as they set. Once you've poured, let your candles cool slowly without any disturbance in a stable environment.
Skip the quick cool downs or breezy spots because these make the wax shrink too fast, creating those wet patches you're trying to avoid. This patient approach keeps that strong bond between your wax and glass intact.
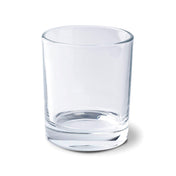
Container preparation and wax selection
Getting your containers ready properly makes all the difference. Make sure your jars are spotless, completely dry, and sitting at room temperature, or give them a gentle preheat before you pour. While soy wax can sometimes develop these issues, choosing a quality blend and sticking to proven pouring and cooling methods delivers great results.
Their specific wax recommendations focus on superior container adhesion that helps prevent these surface problems from developing.
While prevention is ideal, existing candle wet spots can often be fixed with a simple technique. The most effective method focuses on gently re-adhering the wax to its container or jar.
To address wet spots, carefully use a heat gun on a low setting. Hold the heat gun a few inches from the affected area on the outside of the jar. Move it slowly and evenly, allowing the wax to warm and slightly melt against the glass.
You'll see the wet spot disappear as the wax expands and re-adheres. Avoid overheating, which might create air bubbles or affect the fragrance oil.
Once the wax looks smooth, let the candle cool slowly and dry completely at room temperature. This process restores the candle's visual appeal.
Key Takeaways About Candle Wet Spots
Don’t worry if you do end up falling victim to the dreaded wet spots in your candles; they are a natural thing and can even show up months after a candle has been made, or after a few burns of a candle! The main thing is that they are purely aesthetic and can be easily corrected. Our advice is to embrace them! If you really can’t abide them, there are always coloured glass jars that you can use for your candles. We won’t tell if you won’t!
We're here to support you every step of the way. Our comprehensive educational resources give you the knowledge and confidence to master these techniques. Whether you're troubleshooting your first batch or perfecting your hundredth, you'll have everything you need to create stunning, flawless candles that you can truly be proud of.
Why is my candle wet on top?
A "wet" appearance on top of your candle, or an oily appearance, typically indicates that the wax has contracted unevenly during cooling. This can be caused by temperature fluctuations or the natural properties of certain waxes, such as soy wax, leading to the wax pulling away or appearing "wet" due to trapped air or separated fragrance oil. Please note that this is not the same as beads of oil forming on top of the candle, which is known as ‘sweating’.
Is it possible to avoid wet spots entirely?
Not always. Wet spots are a natural, purely cosmetic occurrence and can appear months after making a candle or after a few burns. They’re easy to correct and don’t affect performance, so many makers simply accept them. If you prefer not to see them, concealment (for example, using coloured glass jars) is a simple solution.
NI Candle Supplies specialises in high-quality candle-making materials, offering a diverse range of waxes, wicks, and fragrances. Committed to inspiring creativity, we provide resources for beginners and seasoned artisans. Our mission is to empower candle makers with quality products and expert guidance, fostering a vibrant community of enthusiasts who share a passion for craftsmanship and creativity.