Candles aren’t the only way to bring fragrances into your home. Wax melts have risen in popularity because of their ease and convenience to make. They make for a great addition if you have an existing candle range and they also provide a great starting point into working with wax and the world of candle making.
Read our steps below to learn how to get started with making wax melts.
Step 1: Plan your wax melts
A good starting point if deciding if you’re making wax melts for yourself (and friends and family) or to sell. This will determine how much you should invest in equipment and ingredients.
If you’re planning on selling them you’ll need the appropriate information available for customers to meet local consumer regulations. This is often provided or available from your supplier.
Step 2 - Choose your equipment
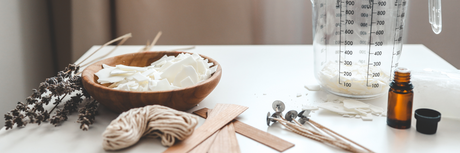
If you’re a current candle maker you’ll likely have most of the equipment below. If you’re new to working with wax, to make wax melts you’ll need:
- Pouring Pot - For safety and quality control, a pouring pot should be a core part of your equipment.
- Scales - A good set of digital scales is highly recommended to ensure your wax and fragrance ratios are correct,
- Stove or Hot plate - Although wax melters are available, we recommend using the double boiler method with either your cooking stove or a hot plate
- Thermometer - Knowing your wax temperature is important for making quality wax melts.
- Stirring utensil - A dedicated stirring utensil is highly recommended for mixing your fragrance and dyes into your wax.
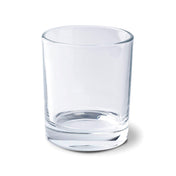
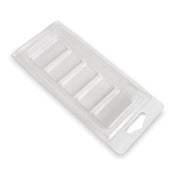
- Moulds - A range of moulds are available to buy online. We have recyclable clamshell pots available which are ideal for makers just starting out.
We also recommend having paper towels, newspaper and cleaning supplies on hand to keep your space clean and to look after your equipment.
Step 3 - Choose your ingredients
There are three main ingredients you’ll need to get started;
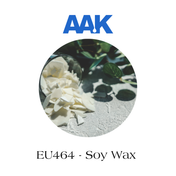
- Wax - It’s important to choose an appropriate wax for your melts as the ideal wax for wax melts is different to that of candles as wax melts need to be removed from their moulds and when used, smaller chunks are often snapped from larger wax melt blocks. Our SASOL 6243 (paraffin) and GOLDEN WAX 494 (soy) waxes are ideal for making wax melts.
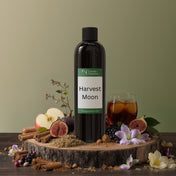
- Fragrance oil - Your fragrance oil is without doubt the most important aspect when it comes to producing goods people will fall in love with. There are many fragrances to choose from - this might even prove to be the hardest part of making your melts. Our Top 10 best selling fragrance oils list can help you get started with what’s popular with our other makers. When using fragrances, a good rule of thumb is 10% or 100 grams of fragrance oil per 1000 grams of wax - but testing and experimenting is always recommended. You can also use our fragrance load calculator to help work out your ratios, this has been primarily designed for candle making but works equally as well for wax melts.
- Enchantments - Personalising your melts with glitter, dye or mica can be a really fun way to help your products stand out from the crowd! Be sure to read our How to Guides for advice on using these products.
Step 4 - Test your melt making process
When starting out with melt making, we would recommend using Golden Wax 494 as it is easy to work with, has superior scent throw and requires one pour only, The process for working with Sasol 6243 is similar to the below in relation to temperatures however paraffin wax by nature will shrink back upon setting and a second pour or slight overpour may be required to compensate for this.
Our testing of the Golden Wax 494 has found that making melts works well when the wax is heated to 80-85°C. From here you can mix in your chosen fragrance and dye, stir gently to ensure they are mixed properly. A gentle stir helps keep a smooth consistency and prevents air bubbles forming in the wax when it’s setting. Then using a pour temperature of around 60-70°C you can pour the wax into your moulds.
Always pour your melts on a protective surface and be focused, slow and intentional when pouring as overflowing wax in moulds and make a mess and comprise the outcome of your max melts.
Different waxes have different guides and ideal temperatures to work with so consider this if you’re working with a range of waxes or are trying new ones. Different moulds also have different heat requirements and higher temperatures can cause some moulds to melt.
We recommend testing your melts in small batches first as the different shapes and sizes can affect the end result.
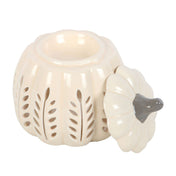
Step 5 - Using your melts
No matter how perfect your wax melt production is, the end result heavily relies on the various melting temperatures of the burner being used. Warmers with higher temperatures will produce a higher fragrance intensity at first but this will dissipate sooner than wax melting on a lower temperature warmer but has a lower intensity fragrance but one that lasts longer.
It’s important to note that the cold throw your max metals give off is not necessarily indicative of the hot throw. While it is possible to burn your wax melts a few hours after making them, if using soy wax we recommend a cure time or 10-14 days for best results - melts made with paraffin wax can be used 24 hours after being made. This can also be a better reflection of how the melts will burn for your customers.
Store your finished melts in a cool dark place to preserve their fragrance load.
Learn more
We hope this guide is a useful introduction to getting started with making wax melts. Be sure to check out other blogs in our Resource Centre. You can find further advice and tips from fellow makers via our Facebook Group.