The festive season, while full of cheer, can sometimes feel a bit… predictable. For candle brand owners, the challenge lies in standing out among generic, mass-produced holiday products. Meanwhile, DIY enthusiasts yearn for a project that's engaging, personal, and brimming with Christmas spirit.
An Advent candle could be the solution. It presents people with the opportunity for a daily ritual, a quiet moment among the festive frenzy. Imagine you (or your customers) lighting your candle after a hectic day—its glow and nostalgic scent, a reminder that Christmas is about more than just presents.
Keep reading to learn how to make a modern, pillar-style Advent candle, plus some other trending alternatives to this 19th-century Christmas tradition.
What is an Advent candle?
The warm glow of an Advent candle has long been a symbol of the Christmas season, its flame marking the passing days and illuminating the path towards the joyous celebration. Traditionally, Advent candles involved a set of four, each representing a week of Advent, lit one by one on successive Sundays.
However, a modern twist on this beloved tradition has emerged: a single pillar candle, boldly marked with 24 daily increments, transforming the countdown into a daily delight. It's a hands-on, interactive way to build the anticipation, sparking a little festive magic with each lighting.
For festive fanatics, this modern take on the Advent calendar offers an engaging alternative to the traditional chocolate countdown. And for established candle brands? It's a golden opportunity—a fresh offering that'll have customers ditching the mass-produced and flocking to your handcrafted creations.
Gather your supplies…
Here’s what you’ll need to craft a pillar-style advent candle:
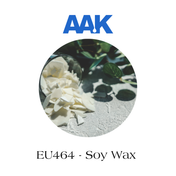
- Pillar wax: You need a specific type of wax for pillars, one with good structural integrity and a clean burn. Also bear in mind that you'll need enough to create a candle tall enough to accommodate 24 markings, so 500g is a good starting point for a medium-sized candle.
- Wicks: Make sure you select the right size for your candle's diameter and the type of wax you're using. A well-chosen wick guarantees a steady, even burn.
- Festive fragrance oils: Infuse your Advent candle with the spirit of the season. Think warming cinnamon, crisp pine needles, or a festive blend of cranberry and spice. Feel free to experiment and create your own signature scent—just don’t mess up the scent combo!
- Marking materials: How will you count down the days? Number stickers offer a simple solution, while paint pens or a woodburning tool allow for more creative flair. Just make sure whatever medium you use, it is safe for candles and non-flammable!
- Other essentials: A thermometer is crucial for monitoring wax temperature, a pouring jug is needed for mess-free pouring and stirring utensils blend your fragrance and colour. Wick glue dots and a wick centring tool keep everything in place for a professional finish.
- Optional touches: Add a touch of sparkle with mica or tie a festive ribbon around your finished candle. Let your creativity guide you! Just make sure to adhere to candle safety guidelines—in other words—do not embed anything in your candle that is flammable.
And don’t forget the golden rule: quality supplies = quality candles.
How to make an Advent candle (pillar-style)

Now, let’s craft an Advent candle that'll have everyone saying, "Bah humbug to mass-produced!" If you’ve already nailed the basics of making a pillar candle down, feel free to skip straight to step 5.
Step 1: Prepare the wax
- Melt: Gently melt your chosen wax in a double boiler or a heat-safe container over simmering water. Keep a close eye on the temperature with your trusty thermometer. Don’t forget that different waxes have different melting points! Aim for a smooth, even consistency, free of lumps.
- Fragrance: Once your wax is melted, it's time to infuse it with the scents of the season. Add your chosen fragrance oil, starting with a small amount and gradually increasing until you achieve your desired strength. Remember, less is often more!
- Colour: Now for the festive touch! Add a few dye chips at a time, stirring gently until the colour is evenly distributed. Clean white candles look great, but don't be afraid to experiment with different shades or even create a gradient effect for a truly unique look.
- Pro tip: To prevent frosting (that unwanted white film on your candle), avoid overheating your wax and allow it to cool slowly.
Step 2: Prepare the Mould
- Secure the wick: Place your wick in the centre of your pillar mould, making sure it's straight and taut. Use a wick holder or a dab of hot glue to secure it at the bottom.
- Centre the wick: Use a wick centring tool to keep the wick upright and centred as you pour the wax. This will create an even burn and prevent the wick from leaning or drifting to one side.
Step 3: Pour the wax
- Steady hand: Carefully pour the melted wax into your prepared mould. Take your time and pour in a slow, steady stream to avoid air bubbles. If any bubbles do appear, gently tap the mould on a flat surface to release them.
- Leave room for shrinkage: Don't fill the mould all the way to the top. Leave a small gap to allow for the wax to contract slightly as it cools, and keep in mind, a second pour may be needed to achieve your desired size.
Step 4: Cool and cure
- Patience is paramount: Now comes the waiting game. Allow your candle to cool and solidify completely. This may take several hours or even overnight, depending on the size of your candle, the type of wax you used and the curing process you follow. Resist the urge to rush this process! A fully cured candle will have a smoother finish and a better burn.
Step 5: Mark the days
- Evenly spaced: Once your candle is fully set, carefully remove it from the mould. Now it's time to add the 24 markings that make it an Advent candle. Use a ruler or measuring tape so that they're evenly spaced along the length of the candle. 1 cm between each marking is a good rule of thumb, but it depends on the height of your candle.
- Get creative: Number stickers are a simple option, but you can also use candle paint pens, a woodburning tool or even carve the numbers into the wax for a rustic look.
Step 6: Light up on the first day of Xmas
- Candle brand owners: Before you share your creation with the world, be sure to test the burn time. Light the candle and time how long it takes to burn down to each marking. This means your customers can enjoy a daily countdown ritual throughout Advent.
- DIY enthusiasts: On the first day of December, light your candle and enjoy the warm glow and festive fragrance as you anticipate the Christmas season. Keep an eye on the burn rate by timing it on the first day to avoid burning through multiple days at once.
With a bit of patience and creativity, you've transformed simple wax into a beautiful and meaningful Advent candle. Now, sit back, relax, and let the countdown begin!
Other types of Advent candles
As we’ve established, there’s no hard or fast rule for the design of your Advent candle. We’ve scoured the web (hello, Pinterest!) for other creative Advent candle ideas to inspire you. They’re slightly different to the standard pillar candle design we’ve detailed above, but you will only need to make a few tweaks to the supplies and method to achieve these designs.
Here are our top-picks:
Tapered Advent candle trio

Embrace a boho-festive vibe with a trio of tapered candles. Dip two in deep festive colours and hand-paint them with cute designs. The third, your Advent candle, will feature those essential 24 markings, adding a touch of tradition to the set.
Pyramid Advent candles

We're smitten with these pyramid-shaped candles that are popping up all over Pinterest. To achieve this striking look, simply follow the same instructions as above, but swap your pillar mould for a pyramid-shaped one. The result? A modern, geometric twist on a classic tradition.
Advent label candles

House your Advent candle in a stylish glass vessel and design a gorgeous label featuring a countdown. Your customers can mark off each day as they light the candle, creating a festive ritual that fills their homes with delightful scents and anticipation. Bonus points for personalised labels with custom messages!
An Advent candle for each day

A collection of 24 numbered tapers, nestled in a sleek box, offers a minimalist yet impactful countdown. It's the perfect choice for those who appreciate understated elegance and a touch of modern flair.
An Advent candle for each day (with a twist)

Take the mini candle concept to the next level with this eye-catching idea: 24 gold-marked mini candles, each a different festive hue, nestled in a jar complete with a lid that doubles as a candle holder. You (or your customers) can light a new candle each day, positioning it aesthetically on top of the display.
The traditional 4-piece Advent candle set

Let's not forget where it all began. Four unadorned pillar candles, representing the four weeks of Advent, are a classic for a reason. Carefully position them in a festive wreath or display them in individual holders inscribed with words like ‘faith’, ‘hope’, ‘love’ and ‘joy’. Light one each Sunday, building a crescendo of illumination as Christmas approaches.
Wax melt advent calendar

Okay, we admit it—this one technically doesn't involve candles, but wax melts are their fragrant cousins, and for some, they're even better! Why? No flames, no fuss, just pure scent-sational bliss. Swap those predictable chocolate squares for a daily dose of luxurious fragrance.
Let the countdown begin!
This Christmas, trade mass-produced monotony for handcrafted magic! Your personalised Advent candle(s) will offer a daily dose of festive anticipation, a sensory journey towards Christmas. Whether you're a candle connoisseur or a DIY newbie, get creative and design a candle-led countdown that's uniquely yours. Ready to spark joy? Head over to NI Candle Supplies and let the festive crafting begin!


