
Ever had that ‘sink or swim’ moment with your candle-making? Floating candles are meant to be the highlight of your collection, but they can be tricky little things to master.
We’ve all been there: watching our creations do a belly flop instead of gracefully skimming the surface. But once you get the hang of the making process, you can transform a simple bowl of water into a spectacle of light with candles that stay afloat AND aglow.
Whether you're wondering how to make floating candles as a newbie, or you’re a fully-fledged candlepreneur wanting to add new, exciting products to your line—this guide is for you.
So, grab your wicks and wax, and let’s make some buoyant beauties.
What are floating candles?
Floating candles are small, self-contained candles designed to rest gently on the surface of water. Unlike traditional container candles, they boast a wider, flatter base to ensure stability and buoyancy. This allows them to "float"—creating a captivating visual element as the flame dances on the water's surface.
While the exact origin remains unclear, floating candles have a rich history, used for centuries in various cultures. Some believe they originated in India, where they were utilised in religious ceremonies. Others trace them back to Southeast Asia, where lotus flower-shaped floating candles played a role in festivals.

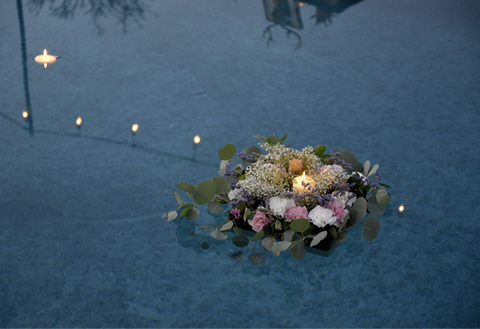
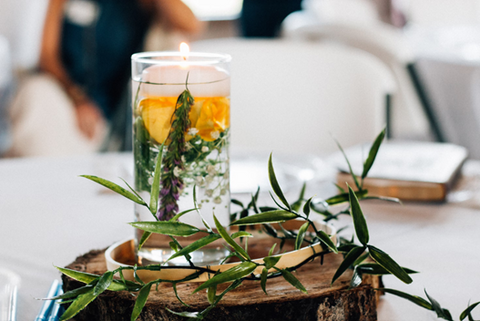
These days, you can find them lighting up everything from cosy home dinners to grand wedding centrepieces. The universal appeal of floating candles lies in their ability to blend seamlessly into any setting, adding a touch of serenity and sophistication. Whether nestled among flower petals for a romantic touch or grouped in large bowls for dramatic effect, floating candles take the candle-burning experience up a notch, making any occasion feel special.
But the appeal of floating candles transcends their visual allure. Their design typically promotes cleaner and more even burning compared to traditional wicks. Additionally, the water acts as a natural heat sink, preventing the candle from overheating and potentially cracking the container (a common issue with incorrectly wicked container candles).
Eager to add a splash of elegance to your candle line-up? It's time to master the basics.
Gather your supplies
Armed with the below essentials, you're set to craft floating candles that not only look stunning but also perform flawlessly:
☑ Wax:
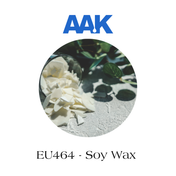
Paraffin is a go-to for its firmness, but soy can work too for a slightly more sustainable option. Keep in mind, the wax's density is key to buoyancy.
☑ Wicks:
Opt for pre-tabbed wicks to ensure stability and ease of use.
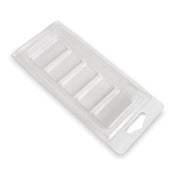
☑ Mould:
Floating candle moulds are wider and shallower than traditional ones, designed to give that essential flat base. Silicone moulds offer flexibility and a variety of shapes.
☑ Melting pot:
For safe and even melting of the wax.
☑ Thermometer:
Essential for monitoring the wax temperature to avoid overheating.
☑ Colourants and fragrance oils:
To customise your candles' appearance and scent. Go for ones that blend well with your chosen wax type.
☑ Heat-resistant surface:
To protect your workspace during the pouring process.
Exploring alternatives? Consider a coconut blend for a natural touch or adding decorative elements like dried flowers or glitter into the wax. Just ensure they don't compromise the candle's buoyancy.
How to make floating candles
Floating candles can turn a simple bowl of water into a magical display. If you're ready to make these buoyant illuminators, follow this guide to ensure your candles not only look enchanting but also float like a dream.
Preparing the wax
-
Choose your wax:
Start with paraffin or soy wax, keeping in mind the buoyancy and burn time you desire. -
Melt the wax:
Use a double boiler to gently melt your wax. Keep an eye on the temperature with a thermometer—ideal melting points are around 80-85°C for paraffin and slightly lower for soy wax.
Setting the wick
-
Place the wick:
Secure a pre-tabbed wick in the centre of your mould. Use a bit of melted wax to hold the wick tab in place, ensuring it stands upright and centred. -
Stabilise the wick:
Keep the wick straight by resting a skewer or pencil across the mould's top and wrapping the wick around it. To be even more precise, use an adjustable wick holder.
Moulding the candle
-
Choose the mould:
Opt for shallow, wide moulds designed for floating candles to ensure stability on water. -
Pour the wax:
Once the wax reaches the correct pouring temperature (about 70-75°C for paraffin, slightly lower for soy), carefully pour it into the mould. Avoid pouring too hot to prevent the wax from setting unevenly. -
Let it cool:
Allow the candle to cool slowly at room temperature. Rushing this process can cause cracks or an uneven surface.
Adding personal touches
-
Customise your candle:
Add colour or fragrance to the melted wax before pouring, if desired. Remember, too much fragrance oil can affect the wax's density and the candle's ability to float.
Finishing touches
-
Unmould the candle:
Once fully cooled and set (this could take several hours), gently remove the candle from the mould. -
Trim the wick:
For optimal burning, trim the wick to about ¼ inch.
Testing the float
-
Test the waters:
Before making a batch, test your candle in a bowl of water to ensure it floats well and burns evenly.
Tips for success:
-
Wax temperature:
Pay close attention to the wax's temperature throughout the process to ensure a smooth finish and consistent burn. -
Wick sizing:
Choose the right wick size for the diameter of your candle to ensure it burns efficiently without drowning in melted wax. -
Trial and error:
Don’t be discouraged if the first few attempts aren’t perfect. Floating candles require a bit of practice to master.
Follow these steps, and you'll be well on your way to creating floating candles that not only add a touch of elegance to any setting but also reflect the care and creativity behind your brand.
Design and decoration tips
Transform the simplicity of floating candles into something even more eye-catching. With a few design adjustments, your creations can go from simply floating to truly captivating. Explore these ideas to get started:
Play with colours
Don't shy away from colour experimentation. Opt for pastels for a soft, ethereal glow or vibrant hues for a bold statement. Just a drop of dye can transform the vibe.
Embed some magic
Embed small, heat-safe trinkets like tiny seashells, metallic beads or candle glitter into the wax. Positioned right, these can add a whole new dimension to your candles without messing with the burn.
Add designs to the surface
When the wax is almost set but still pliable, use tools or even a toothpick to etch in designs or textures. It’s your chance to put a personal stamp on each piece.
Create layered looks
Create a visually striking candle by layering differently coloured waxes. Pour one layer, let it set slightly, then pour the next. This technique can result in stunning, multi-toned candles that catch the eye.
Top tip: Keep your creative spirit in check with functionality. Decorations should never compromise the candle's buoyancy or flame.
Safety tips for floating candles
Candle safety should always be your top priority, both during the making process and when the candles are being used. Here are essential safety tips:
- Ensure your crafting area is stable, heat-resistant, and away from any flammable materials. This minimises the risk of accidents during the candle-making process.
- Never leave floating candles unattended. Always extinguish candles before leaving the room, and ensure they're floating in a stable, heat-resistant container filled with water.
- When in use, place floating candles away from any potentially flammable objects like curtains, papers, or foliage. The open flame, though small, can ignite nearby materials.
- Ensure floating candles are out of reach of children and pets. The allure of water and light can be tempting to touch, leading to potential accidents.
Adhering to these safety guidelines ensures that your floating candles not only captivate but do so safely, allowing for peace of mind and enjoyment of their serene beauty.
Troubleshooting common issues
Even the most seasoned candle crafters can hit a snag when it comes to floating candles. Whether it’s wicks that won’t stay put or candles that prefer diving to floating, these hiccups can be frustrating. Fear not, we’ve got the fixes:
Wick woes
A candle's wick is its lifeline, especially for floaters. If your wicks are playing hide and seek, ensure they’re firmly anchored. A dab of hot wax can secure them in place before you pour.
Uneven bases
Floating candles with uneven bases are like boats with holes—they just won’t sail. Ensure your pouring surface is level, and consider a second pour to smooth out any bumps after the initial set.
Wax wobbles
Different waxes can lead to different issues. If your candles are toppling over, you might need to experiment with a blend that’s sturdier and offers a wider base for buoyancy.
Melting mishaps
Seeing your candles melt away too quickly? It might be time to tweak your wax-to-wick ratio. A thinner wick could slow the burn, giving you more float time.
No need to worry about any mistakes; each one is a step towards mastering the art of floating candle creation. Keep experimenting, and you’ll soon have the perfect formula for success
Light up your life with floating candles
That's the lowdown on how to make floating candles that make a splash (not literally, of course). It's all about getting those basics right and then letting your creativity flow. Stick with it, and you'll soon have a collection of floating candles that not only look great but perform perfectly too. We’d love to see how yours turn out—feel free to tag us on Instagram (@ni_candlesupplies) and we’ll give you a shoutout.


1 comment
Thanks for getting more info