As the festive season fast approaches, it's time to think about how to make your Christmas table as magical as the occasion itself. The right Christmas table decorations can transform an ordinary dinner into an extraordinary feast, creating a warm and welcoming atmosphere for family and friends.
We’ve rounded up some easy, budget-friendly ideas for you to prepare for the big day. While some will have you foraging in the great outdoors for supplies, others will require a little more time and crafting skill. From simple yet elegant designs to elaborate creations, there’s something to enhance every tablescape.
Christmas table decorations to impress your guests
Rosemary wreath name tags

Open your festive dinner with a touch of herbal elegance using rosemary wreath name tags. These charming, aromatic additions to your table are not only easy to make but also add a natural, rustic vibe.
How to make them:
- Take a sprig of rosemary and bend it gently to form a circle.
- Secure the ends together using a small piece of twine or floral wire.
- Attach a small brown label to the wreath for the guest's name.
- Place it atop your green glassware for a cohesive and natural look.
What you’ll need:
- Fresh rosemary sprigs
- Twine or floral wire
- Small brown labels
- Pen for writing names
Dried orange slices

Invoke a sense of vintage charm on your Christmas table with dried orange slices. These beautifully translucent, citrusy ornaments catch the light and add a warm, nostalgic glow to your setting. They can be used as napkin ties or simply scattered around for a festive touch.
How to make them:
- Preheat your oven to a low temperature (about 200°F or 95°C).
- Thinly slice oranges and blot with a paper towel to remove excess moisture.
- Place the slices on a baking sheet lined with parchment paper.
- Bake for about 2-3 hours, turning occasionally, until they're completely dry but not burnt.
- Once cooled, punch a small hole near the top of each slice.
- Thread a piece of red velvet ribbon through the hole for hanging or attaching to napkins.
What you’ll need:
- Oranges
- Baking sheet
- Parchment paper
- Paper towels
- Oven
- Hole punch or small sharp object
- Red velvet ribbon
Christmas candles

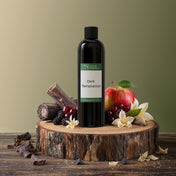
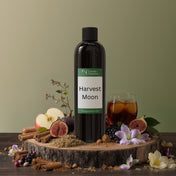
Making candles involves a little more prep and planning, but the results are so worth it. That cosy glow of candles is a staple when it comes to Christmas table décor, and showcasing your own handmade creations is even more heart-warming and special. And it’s not just about illuminating the setting, it’s about infusing your space with those nostalgic Christmas scents like cinnamon, gingerbread and mulled cider.
How to make them:
- Start by melting candle wax in a double boiler. Add dye at this stage if you want colour.
- Once melted, let the wax cool slightly and then add your choice of festive fragrance oils.
- Secure a wick in the centre of a candle mould or jar.
- Pour the scented wax into the mould, ensuring the wick stays centred.
-
Allow the candle to cool and solidify completely before removing it from the mould.
**Discover detailed steps in NI Candle Supplies comprehensive candle-making guide.
What you’ll need:
- Candle wax (like soy, paraffin or coconut)
- Double boiler or similar setup for melting wax
- Fragrance oils (Christmas scents)
- Candle dye (optional)
- Wicks
- Candle moulds or jars
-
Thermometer (to monitor wax temperature)
**For more information on candle-making equipment, please visit NI Candle Supplies.
Mistletoe napkin rings

Bring a hint of playful romance to your Christmas table with napkin rings made from real or fake mistletoe. It's a cheeky nod to the tradition of kissing under the mistletoe, but let's keep the smooches away from the dinner table!
How to make them:
- Gather small sprigs of mistletoe, ensuring each piece has a few leaves and berries.
- Form a small ring from floral wire, sized to fit around your napkins.
- Attach the sprigs to the wire ring using floral tape, arranging them neatly around the ring.
- Trim any excess stems for a tidy look.
What you’ll need:
- Mistletoe sprigs
- Floral wire
- Floral tape
- Scissors
- Napkins
Mason jar snow globes

Transform ordinary mason jars into whimsical snow globes, an enchanting addition to your Christmas table. These charming DIY globes can capture the magic of a winter wonderland right at your dinner setting.
How to make them:
- Fill the bottom of a mason jar with artificial snow or glitter.
- Attach small festive figurines or trees to the inside of the jar lid using strong glue.
- Once dry, carefully screw the lid back onto the jar, with the figurines now inside the globe.
- Turn the jar over, and shake gently to create a snowfall effect.
What you’ll need:
- Mason jars
- Artificial snow or glitter
- Miniature Christmas figurines or trees
- Strong glue
- Optional: ribbon or twine for decoration
Christmas table wreath

Who said wreaths only belong on your front door? Turn tradition on its head by transforming your Christmas wreath into a stunning centrepiece. Complete the look with a candle centrepiece.
How to make them:
- Choose a wreath that fits the size of your table. A lush, green wreath with pinecones and berries works well. Bonus points if you craft your own wreath!
- Place the wreath in the centre of your table.
- Within the wreath, strategically position a candle or two in their holders. Ensure they are stable and secure—this is super important for safety.
- If you like, add extra decorations to the wreath, such as ribbons, ornaments or small twinkling lights.
What you’ll need:
- Christmas wreath
- Candles in suitable containers
- Optional: additional decorations (ribbons, ornaments, lights)
Christmas tree napkin fold

For those bustling with holiday preparations yet still seeking to add a special touch to their table, the Christmas tree napkin fold is a quick and impressive solution. This easy technique transforms ordinary napkins into charming Christmas trees, adding a festive flair with minimal effort.
How to make them:
- Lay a square napkin flat on a surface.
- Fold it in half diagonally to form a triangle.
- Starting from the bottom, fold up the layers of the napkin one by one, leaving a little space at the top.
- Flip the napkin over and fold the left and right sides to form a tree shape.
- Flip it back and tuck the bottom layers under to secure the tree shape.
What you’ll need:
- Square napkins (cloth works best)
- Flat surface for folding
Wood slab charger plates

Create a winter woodland vibe with wood slab charger plates. Here’s the fun part: you can go on a crisp walk to gather pine cones and fresh greenery to complement your rustic table setting.
How to make them:
- Choose wood slabs of suitable size for your dinner plates, available at craft stores or from larger wood pieces.
- Sand the wood slabs to smooth any rough edges.
- Apply a food-safe sealant to protect the wood and your dinnerware.
- Arrange the treated slabs on your table, placing dinner plates on top.
- Accentuate with gathered pine cones and greenery.
What you’ll need:
- Wood slabs
- Sandpaper
- Food-safe wood sealant and brush
- Pine cones and fresh greenery
Christmas gingerbread cookie grazing board

Who said your decorations couldn’t be edible? A gingerbread cookie grazing board is not only only a treat for the eyes but it’s also a great way to end your festive dinner on a sweet note.
How to make them:
- Bake a variety of gingerbread cookies in different shapes like stars, trees, reindeer and snowflakes.
- Once cooled, decorate them with icing, candies, and edible glitter for a festive touch.
- Arrange the decorated cookies on a large wooden board, creating a visually appealing layout.
- Fill in any gaps with nuts, dried fruits, and small candies to add texture and variety.
- Place the board in the centre of your table for guests to enjoy throughout the meal.
What you’ll need:
- Gingerbread cookie dough
- Cookie cutters (Christmas-themed shapes)
- Icing and decorating tools
- Edible decorations (sweets, edible glitter)
- Large wooden board
- Assorted nuts, dried fruits, and candies
Rustic kraft crackers

There's something truly special about the snap and surprise of a Christmas cracker at the dinner table. This year, why not give this tradition your own personal spin? Start with some plain kraft crackers from your local craft store and turn them into unique tokens of affection for your guests.
How to make them:
- Purchase plain kraft crackers from a craft store.
- Personalise each cracker by adding your own decorations, such as festive stickers, drawings or ribbons.
- Carefully open one end of each cracker and insert small gifts, jokes or sweets of your choice.
- Re-seal the end by gently twisting and tying it with a piece of ribbon or twine.
- Arrange the decorated crackers on your Christmas table, perhaps as part of each place setting.
What you’ll need:
- Plain kraft crackers
- Small gifts or trinkets
- Festive decorations (stickers, ribbons, markers)
- Ribbon or twine
It’s time to start crafting your Christmas table decorations
In the spirit of the season, remember that the best Christmas table decorations are the ones made with your own hands and heart. It's not just about saving a few pennies; it’s about adding your personal touch to every detail. From crafting unique kraft crackers for each of your guests to lighting up the room with your handmade candles, these personal touches make Christmas more intimate and special.


