If you’re reading this guide, it’s likely you’ve purchased one of our wax melt making kits. We’re going to take you step by step through the process on how to make your melts. This process applies to all wax melt making, whether this is a gift for a loved one or you get the melt making bug; you will know exactly what to do and what supplies you will need.
Ready to get started? Below is a list of everything the kit contains, be sure to double-check this before you start:
Your kit includes:
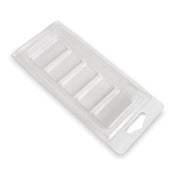
- 6 x Clamshells
- 6 x Round safety warning labels
- 1 x Bag of Golden Wax 494
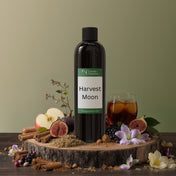
- 2 x 30ml candle fragrance oils
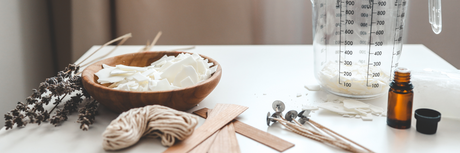
You will also need:
- A double boiler or microwave to melt your wax
- Paper towel
- Digital kitchen scales
- A plastic jug to mix your wax and fragrance in - this needs to have a pouring spout / lip
- A spatula to mix your fragrance into the wax (you can use your thermometer if suitable)
- A thermometer to check the temperature of your wax
Once you’re happy you have everything you need, it’s time to move on to the melt making process. We would recommend having your kit contents on one table or workbench and your melt making area on another.
Step 1: Setting up your clamshells
Prepare your workbench by placing some paper towel over the surface to catch any drips that may occur when pouring your melts.
Open the lid of each of your clamshells and make sure they are completely clean and dry in preparation for melt making. Any wax or water residue can affect the end product result.
Place your clamshells spaced evenly apart on your prepared workbench ensuring you leave enough space to make pouring easy.
Step 2: Melting and pouring the wax
We recommend the double boiler method to melt the wax.
Use your scales to divide the bag of wax in half, then place one lot of wax into the top of your double boiler and ensure that the wax reaches a temperature of approximately 85C using your thermometer to check while heating.
Alternatively, use a microwave and microwave safe container (not included) to melt the wax.
Once the wax reaches the correct temperature, pour the wax into your plastic pouring jug.
Step 3: Mixing and pouring the fragrance
Choose one of the fragrance oils, pour half a bottle into the molten wax and stir thoroughly using your spatula or thermometer. Once well mixed, slowly pour the combined wax and fragrance into three of the clamshells you prepared earlier dividing the mixture evenly between all each one.
Now let your melts cool down for at least five hours before moving them. You can now repeat steps two and three with your remaining wax and fragrance.
*Note: you will have half a bottle of each fragrance remaining, hold onto these as you can use them next time you purchase wax to make melts.
Step 4: Finishing the melts
Once completely set, gently close the lid on each of your clamshells and allow them to harden overnight so that they become completely solidified. Once completely set, you can peel the backing off the warning label and apply this to the underside of your melts.
Congratulations! You made your first homemade wax melts! We hope you enjoyed wax melt making as much as we do. If you need any additional help or information, please feel free to reach out to our customer service team.
Step 5: Burning your melts
Ideally, soy wax melts should be allowed to cure before being used, this helps the fragrance and wax molecules fully bind together resulting in a stronger smelling wax melt on burning. We suggest allowing your melts to cure for between 10 to 14 days to achieve best results.
Once ready to burn, pop one segment out from your clamshell and place in the top of a suitable wax melt burner. Follow the instructions for your melt burner with regards to what size tealight candle to use and how long to burn the melts for. Always be sure to follow the safety advice on the warning label when burning your melts.
Use of this wax melt making kit:
Our candle making kits have been designed to allow you the enjoyment of making your very own melts at home, once made these melts are intended for use by yourself and should not be sold to others. Wax melt making is a very rewarding process and one that can make an excellent business however in order to sell your melts, you must comply with all legislation including the requirement for CLP labels to be included on your goods. Should you decide to make the leap into starting your own wax melt making business, please contact us and we will be happy to send you an advice sheet with further information on how to do so.