
Let's face it, life's busy, but here's a little secret: making pillar candles can be your perfect escape into creativity. If you're a keen crafter dipping your toes in candle making or even dreaming of starting your own candle brand, mastering the art of pillar candles is a fantastic starting point. These sturdy, stand-alone beauties are a staple in any candle line (and any home, for that matter!)
In this guide, we'll walk you through the basics of crafting your own pillar candles. It's simpler than you might think, and the result? Candles that not only light up your room but also showcase your flair for style and ambiance. So, whether you're making them for your home or eyeing the next big thing for your candle line, read on to discover how to make pillar candles like a pro.
First things first, you will need…
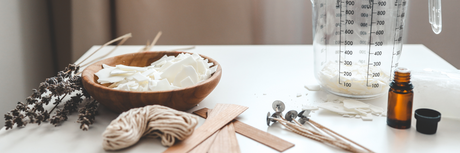
To kick off your candle-making adventure, gather these essentials:
- Wax: You’ll need one that’s specifically designed for pillar candles, Like Sasol 6243.
- Wicks: Spooled wick is often best, allowing you to measure the correct length.
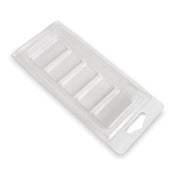
- Candle Moulds: Pillar shape is key here; pick the size and design that speaks to you.
- Double Boiler: For melting that wax just right.
- Thermometer: Keeping tabs on your wax temperature is crucial.
- Fragrance oils: If you fancy adding a scent.
- Colour dyes: To give your candles that personal touch.
- Glue dots: Keep those wicks firmly in place.
- Stirring stick: For mixing in all the good stuff.
Now that you've got your candle-making supplies and equipment ready, let's get into the steps of transforming these raw materials into elegant pillar candles.
How to make pillar candles (a complete guide)
Step 1: Prepare your vessel
Begin by making sure your pillar candle vessel is spotlessly clean and dry. Slide the wick up through the opening in the base of the pillar candle mould, to secure the wick at the base, use a candle wick glue dot. This helps prevent any wax leakage during the pouring process. Carefully stretch the wick up through the centre of the vessel, ensuring it’s straight and taut. If your vessel doesn’t have a guide for the wick, employ a centring tool to maintain its position. Getting the wick placement right is essential for your candle to burn evenly and efficiently.
Step 2: Melt the wax
Using a double boiler, gently melt your chosen wax. Keep an eye on the temperature with your thermometer––you're aiming for about 85°C (185°F ) for most waxes. This is hot enough to melt the wax without overheating it. Stir occasionally to ensure even melting. Patience is key here; rushing can lead to issues later on. Once fully melted and at the right temperature, you’re ready to add colour and fragrance.

Step 3: Add colour and fragrance
This is where you personalise your candle. After the wax reaches the ideal temperature, it’s time to stir in your chosen colour dyes and fragrance oils. Mix them in thoroughly to ensure an even colour and scent distribution throughout the wax. Remember, a little goes a long way, especially with fragrance oils. Once everything is mixed in, give the wax a final stir and prepare to pour.
Step 4: Pour the wax
Carefully pour the melted wax into your prepared vessel, keeping the wick centred and straight. Pour slowly to avoid creating air bubbles. Fill the vessel to the desired level, but not all the way to the brim. Leave some space at the top. After pouring, let the wax cool and set. Avoid moving the vessel during this time to ensure a smooth, even surface on your candle.
Step 5: Allow the wax to cool and set
Once you've poured the wax, let it cool and solidify. This will take several hours. Resist the temptation to speed up the process with cooling aids like the fridge, as this can lead to cracking or uneven setting. Patience is crucial for a flawless finish. As the wax sets, it might sink slightly in the centre, which is perfectly normal.
Step 6: Second pour (if needed)
If a sinkhole forms in your candle after the initial set, prepare a small amount of wax, just like in Step 2. Once melted, use a skewer to poke several holes into your candles and pour it into the sinkhole to level the surface of your candle. This second pour ensures a smooth, even top and the holes ensure no air pockets are trapped underneath. Let it set completely, just as you did with the first pour.
Step 7: Trim the wick and finish
After the wax has fully set, carefully release it from the mould and trim the wick to about 1/4 inch. This is the ideal length for burning. And voila, your handmade pillar candle is now ready! Whether it's for personal use or part of your candle line, you’ve now crafted a beautiful, functional piece of art.
Step 8: Cure the candle
Before lighting your new pillar candle, it’s important to let it cure. Curing is the process of letting the candle sit for a few days, which allows the fragrance oils to fully bond with the wax, enhancing the scent throw when burned. Store your candle in a cool, dry place away from direct sunlight for at least 1 to 2 weeks. This patience pays off, ensuring your candle burns more evenly and releases a richer aroma when it's finally time to light it.

Step 9: Test the candle for safety
Once your candle has cured, it’s wise to conduct a test burn. This step is especially important if you’re planning to sell your candles. Light the candle and let it burn for a couple of hours to observe its burning behaviour. Check for a clean, even burn and note the scent throw. Also, ensure the wick doesn’t cause any unusual flickering or smoking. This test helps ensure your candle is not only beautiful but also safe and effective, providing peace of mind for both you and your customers.
Ready, set, craft!
From preparing your vessel to the final safety checks, each step in our ‘How to Make Pillar Candles’ guide brings its own satisfaction. Remember, every candle you craft is an extension of your creativity and care. Whether for your home or your budding candle business, these handmade treasures will surely bring warmth and joy. Keep experimenting and watch your skills––and your candle collection––glow and grow.


1 comment
Could you tell me how you get that rugged look for the pink candles in the first picture please?
———
NI Candle Supplies LTD replied:
Thanks for your question, Vedia. There are two main method to achieve this look: 1) The Cold Pour Method – achieved by pouring at the lowest possible temperature into a unheated mould, so jump lines form creating a dry, distressed surface. And, 2) The Snowflake Effect (paraffin wax is needed for this effect) – achieved by wiping the inside of the mould with mineral oil, then adding 4 teaspoons of the oil per 500g to your paraffin wax, and slow the cooling process as much as possible.