You know that mesmerizing glow and soothing flicker we all love about candles? The one that sets the mood for quiet evenings in or bubbly brunches?
While we often get caught up in the dizzying array of fragrances or the endless discussions about wax types, let's pause for a moment and tip our hats to the unsung hero: the humble wick of the candle. This often-overlooked component isn't just a mere candle string; it's the heartbeat of every candle. It’s what takes those fragrances and waxes and turns them into the atmospheric vibes we love about candles.
Choosing the right wick is like finding the perfect foundation for a house—get it right, and everything else falls into place. So, as we dive into our trusty stash of candle supplies, let's shine a light on the role of the wick, ensuring our candles don’t just look pretty, but burn beautifully too.
What are candle wicks made of?
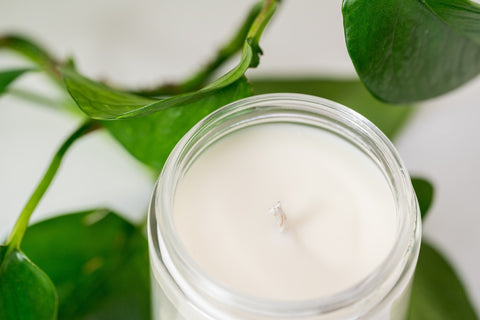
Let’s start with a burning question for every budding candle crafter: What exactly are those candle wicks made of? And more importantly, how do you pick the one that's just right for your candle-making escapade? Let’s take a look at two classic options:
Cotton wicks
The traditionalist's favourite! Most of the candles you see around likely have a cotton wick. Why, you ask? Well, cotton wicks are renowned for their consistency. Made primarily from, well, cotton (no surprises there!), these wicks provide a steady burn, ensuring your candle melts evenly and releases fragrance reliably. Here are some of the benefits you can expect from this old faithful:
- Consistent burn: Cotton wicks tend to offer a more consistent burn rate, which means fewer instances of 'tunnelling' in your candles.
- Clean burning: When paired with the right wax, cotton wicks produce minimal soot, ensuring a cleaner burn experience.
- Versatility: Suitable for various waxes, cotton wicks are the go-to for many candle crafters starting their journey.
Wood wicks
For those looking to add a touch of rustic charm and a hint of crackle to their candles, wood wicks are the answer. Made from natural wood (like cherry or softwood), these wicks offer a unique aesthetic and auditory experience. Here’s why we would always favour a wood wick:
- Ambient sound: That gentle crackling sound reminiscent of campfires? That's the wood wick working its magic!
- Even melt pool: Due to their wide, flat shape, wood wicks tend to create an even melt pool, which means better fragrance throw.
- Visual appeal: There's something undeniably aesthetic about the gentle flame dancing on a wood wick, giving your candles a distinct look.
Both cotton and wood wicks have their own set of advantages. While cotton is about reliability and versatility, wood wicks bring a touch of ambiance and charm to the table. Your choice might depend on the vibe you're going for, the candle wax you're using, or even just personal preference. Remember, the heart of a great candle lies in experimentation and finding what resonates best with your vision!
Choosing the right wick size for your candle
One of the essential aspects of candle-making that is often overlooked is selecting the appropriate wick size. A candle's performance and safety largely depend on this crucial choice. While the type of wax, fragrance oils, and additives play significant roles, the wick size can make or break your candle's burn experience. Here's how to determine the perfect wick size for your candles:
Diameter of your candle: The most fundamental aspect is the diameter of the container or mould you're using. Wicks come in various sizes, and each is designed to burn effectively over a specific candle diameter. If your wick is too small, it might drown in its own wax. Too large, and your candle might burn too hot, causing potential hazards.
Wax type: Different waxes have varied melting points and characteristics. For instance, a denser wax might require a larger wick for effective burning. It's essential to consider the specific type of wax you're using when choosing a wick.
Additives and fragrance: If you're adding fragrance oils, dyes, or other additives to your candle, it can influence the burn. Heavily scented candles might need a slightly larger wick to ensure a clean and complete burn.
Testing is key: Even with all the guidelines, there's no replacement for actual testing. It's always advisable to test a few different wick sizes to see which provides the optimal burn for your specific candle composition.
For a visual guide on how to determine the perfect wick size, check out this informative video: How to Choose the Right Wick Size.
Remember, the heart of a fantastic candle is not just in the fragrance or the wax but also in the perfect wick. Ensuring you have the right size will help your candles burn safely and efficiently, providing the best experience for users.
How to set and secure your candle wicks (a step-by-step guide)
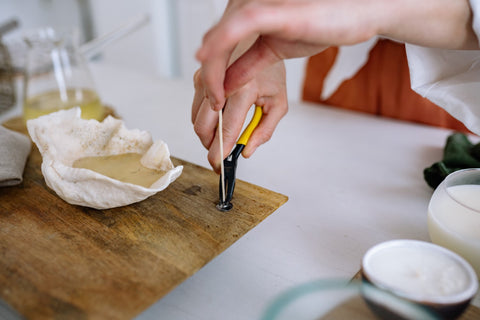
If you've made it this far, it means you're knee-deep in the world of candle-making. But, before you pour the enchanting candle wax, there's an art to setting and securing that often-overlooked hero—the wick! Without a properly placed wick, you might just end up with a beautiful candle that doesn’t burn right. Here's how to set the stage for your wick's shining moment.
Step 1: Clean the stage
Start with a pristine candle container. A quick wipe-down using a clean, dry cloth ensures the container is devoid of any dirt or residue that might interfere with the wick's adherence.
Step 2: Wick stickum or glue dot - your choice!
To secure the wick at the base, you can choose between a wick stickum or a glue dot. Both are equally efficient; it's all about personal preference!
Step 3: Press down, all around
Position the wick in the centre of the jar. Firmly press down on all sides of the tab. This ensures your wick stays put, even when the wax is melted.
Step 4: The art of alignment
For a perfectly cantered wick, use a wick centring tool or even a chopstick or a pencil. This ensures the wick stands tall and proud, directly in the middle of your container.
Step 5: Beware the floating wick
One of the common missteps for beginners is not securing the wick adequately. If not adhered properly, the wick can float up when the wax is poured, leading to a wonky burn. Ensure it's glued down well to avoid this!
Step 6: Pour and perfect
Once your wick is secure, you're all set to pour in your wax. As the wax sets, do a quick check to ensure the wick hasn't shifted. Adjust if necessary.
Step 7: Let it set
Before you light up your creation, allow the wax to set completely. This ensures that everything stays in place, leading to a beautiful, consistent burn. Don’t forget, if you’re using fragrance, you really want to let your candle cure for a minimum of 10 to14 days for maximum impact!
Setting and securing the wick might seem like a small step in the candle-making process, but its impact is monumental. Proper wick placement guarantees a better burn and ensures your candle not only looks great but functions flawlessly. Remember, it's the little things that make the biggest difference!
Wick safety tips
When it comes to burning these little wax wonders, the ambiance and fragrance are truly magical, but candle safety should always take the front seat. The wick of the candle plays a pivotal role here.
Ensure your wick is centred and trimmed to about 1/4 inch before each burn. Avoid using wicks that are too large for your candle container, as this can cause the wax to overheat, leading to cracked containers or even a potential fire hazard. Always keep an eye out for a flickering or smoking wick, which signals it might be time for a trim or that there’s an issue with the wick's material. And if you’re wondering what other steps you need to create a safe candle experience, take a look at our ‘what to avoid in candles’ guide.
The heart and art of candle crafting
The truth is, while the soft light and alluring scent captivate us, the heart of a candle—the wick—does all the hard work behind the scenes. We’ve learned that knowing how to make handmade candles isn't just about the wax or the fragrance; it's also about understanding and valuing the wick's role.
With the right candle-making supplies and the knowledge you've gained today, you're poised to craft candles that radiate warmth, charm, and character. So, as you embark on your candle-making adventures, remember that the glow begins with the wick.








2 comments
Hola tengo problema con las mechas. Mi vaso es 10z Diameter 3 1/8. Wax soy 10 . Epueto CD 10 y 12 no me funcionan
———
NI Candle Supplies LTD replied:
Thanks for your comment Carmen. We are having a bit of trouble getting it to translate correctly (apologies, we don’t speak Spanish) but can advise we do not offer the CD style of wicks, so are limited in our ability to provide advice on these. If you can email us with more details, including the type of wax you are using; we would be happy to suggest some wicks for testing from our range.
I have been making my own candles now for nearly 5 years but just give them to my friends and family as I am not in a position to go as a business and sell my candles to shops.
I would love to have a small outlet that would take my candles, soaps and wax melts, but the problem is I am slightly disabled and can’t drive now, plus I don’t have enough money to start a business and all that it entails.
My friends are continually on at me to go for it, but it is down to the money side of things as there is a lot involved in setting up a business.
My years of testing all aspects of my candle making has indeed paid off, and my candles turn out lovely.
In the script above it mentions wooden wicks (I use cotton), and I feel I would like to try them out, but would not know what size to get. I always use 30cl glassware and have my logo stickers on them. Will need to read up on the wooden wicks.
Thank you again for the informative information about the wicks.